How do I use categories?
When you create a new document, Banktivity prompts you to choose between "Home" and "Business" categories, and starts you off with a basic list of categories based on your selection. If you start by importing data from another financial program, Banktivity will bring in your categories from the other program to get you started. As you continue working with Banktivity, you can customize the category list to better suit your needs.
Assign categories to transactions
In an account register, create a transaction or edit an existing one, and type a category name in the category field. Banktivity will suggest the names of existing categories as you type: when the drop-down list of category names appears, use the Up and Down Arrows on your keyboard to highlight one, then press Tab to accept it.
You can also assign a categories by selecting one or more transactions in the register (Command-click to select multiple), then choosing a category from the Transaction > Category menu.
Manage categories
Click "Configuration" in the sidebar, then click "Categories." The category list will appear to the right:
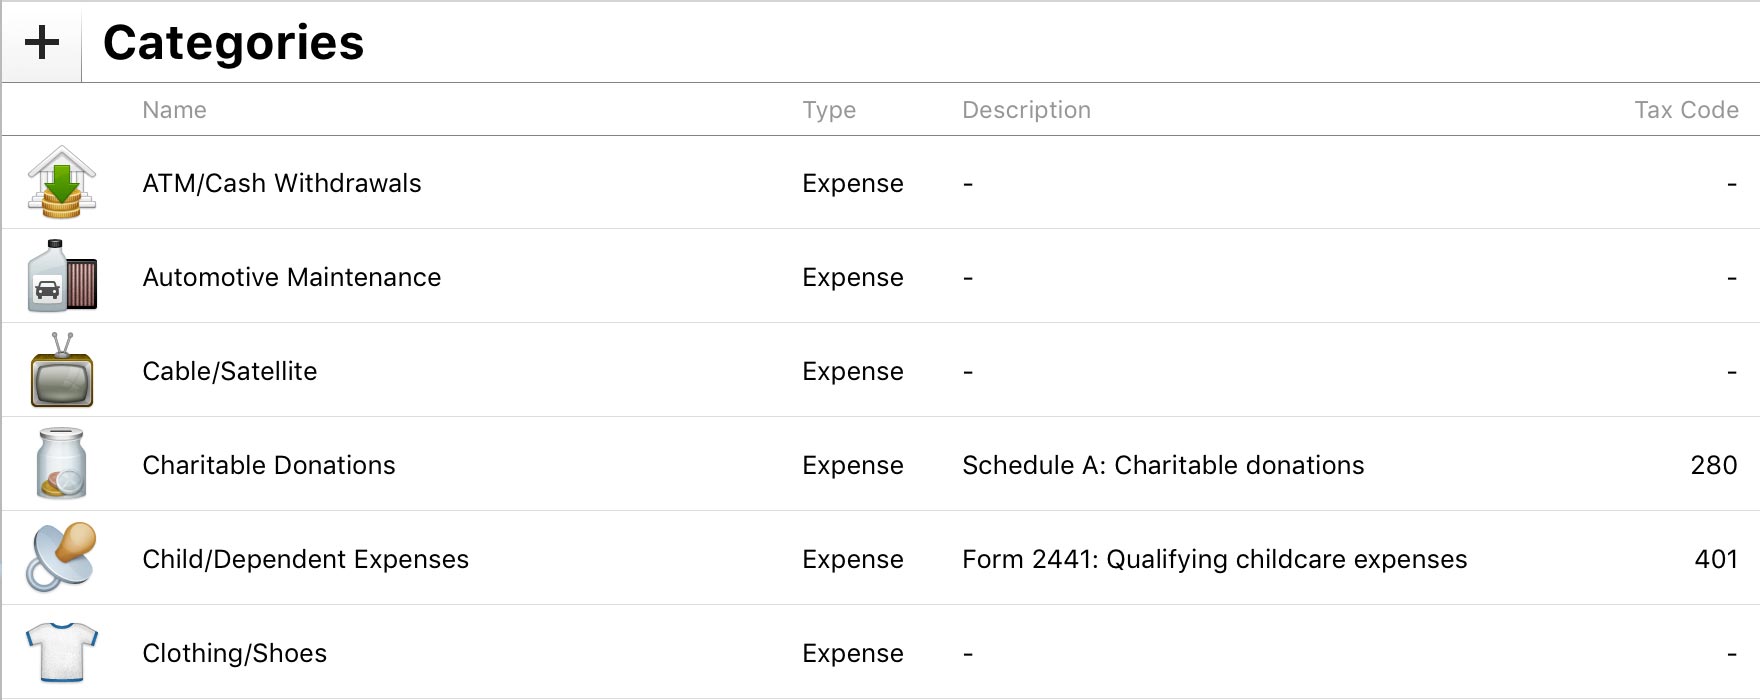
Here you can see all of your categories arranged alphabetically. Sub-categories appear indented beneath their parent categories.
Adding
To add a new category, click the plus (+) button above the list. A sheet will appear asking you to enter information about the new category:
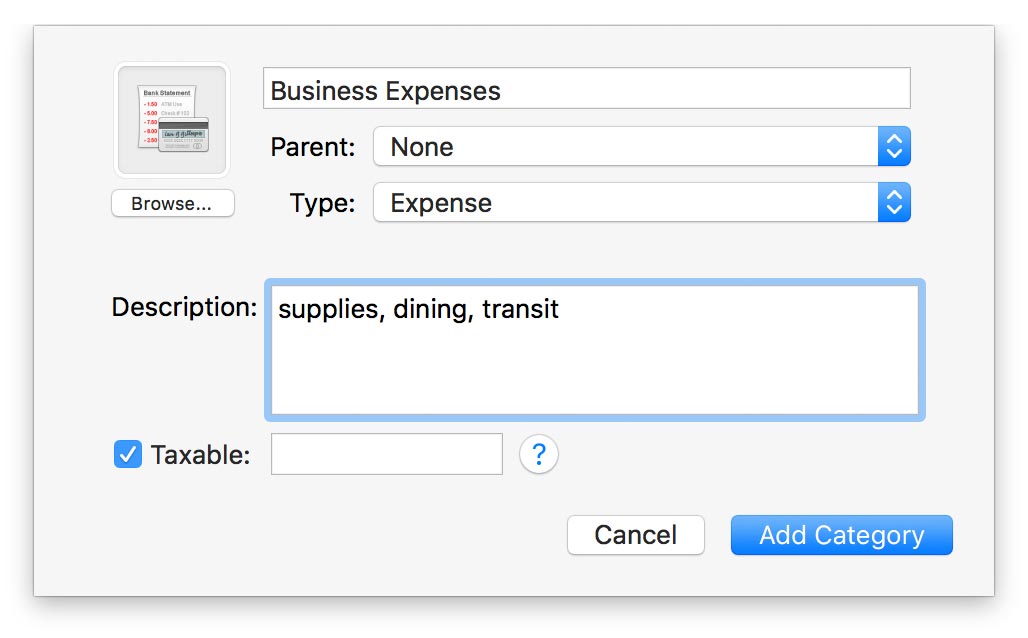
- Image: Category images appear in the account register next to transactions they are assigned to. To add an image to a category, click the "Browse" button and choose one of the available images. To use a custom image, drag and drop an image file from the Finder onto the image box, or click to select the category's image box and choose Edit > Paste to insert an image from the clipboard. To remove the image, select the image box and press Delete on your keyboard.
- Category Name: Enter a unique name for the category. Categories may not have the same name as any of your accounts.
- Parent: If you want the new category to be a sub-category, click this button to choose which category it will belong to.
- Type: Click this button to choose whether the category should be used to track income or expenses. Both types can be assigned to transactions of any value, but budgets and reports will use the category type to determine how to organize and calculate totals for each category.
- Description: Enter a longer description for the category if desired. This will help you to identify the purpose of the category when browsing the category list.
- Taxable: Check this box to designate the category as tax-related. Items that are "Taxable" will be added to US Tax reports automatically and can be included in TXF exports.
- Tax Code: If the category is associated with a particular tax code, enter the number of the code in this field to help you remember it. Click the help (?) button to view a list of US tax codes.
Configure the new category the way you want it, then click "Add Category" to finish adding it to the list.
You can also create a new category simply by typing it into a transaction's category field. When you save the transaction, Banktivity will ask you to configure the new category as described above.
Editing
To edit an existing category, double-click it or select it and press Enter on your keyboard. In the sheet that appears, change any of the properties listed above and click "Apply Changes." If you modify the category's name or parent, all transactions to which the category is assigned will automatically update to reflect the changes.
Deleting
To delete a category, select it and choose Edit > Delete, or press Delete on your keyboard. You will be asked to confirm that you want to remove the category. If the selected category has sub-categories, those will not be deleted, but will be moved to the main category list. When you delete a category that has transactions assigned to it, Banktivity will remove the category from those transactions. The transactions themselves will not be deleted, but they will no longer have categories assigned to them.
Merging
If you discover that you have duplicate categories, or if you simply wish to merge two or more items, Banktivity makes it easy. Select multiple categories in the list with Command-click. Click the "Merge" button at the top of the list, and a single category will be created with "combined" appended to its name. All transactions that were previously assigned the original categories will now be assigned the new category. Feel free to edit the new category to change its name.
Organize categories hierarchically
Categories can be organized into levels of hierarchy so that some categories are listed under others.
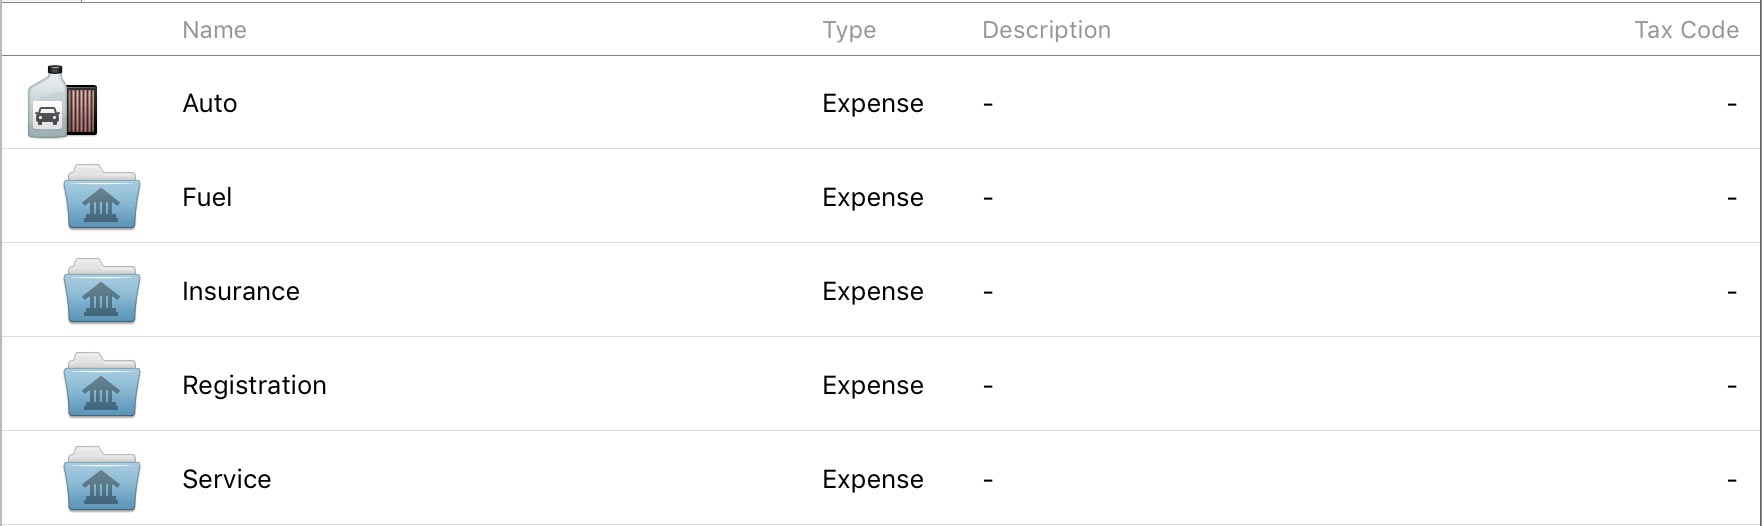
Say, for example, that you have a category for auto expenses named "Auto". You want to track all of your car-related expenses under this category, but what if you also want to be able to track how much you spend on repairs alone, or gas? Banktivity makes it easy to create sub-categories, so that you can categorize both "Service" and "Fuel" under "Auto". Using reports, you can then see at a glance how much you spent on repairs alone, or how much your car is costing you in total:
Creating sub-categories
To add a sub-category, click the plus (+) button at the top of the category list. Name the category as you like, and be sure to choose a parent category using the "Parent" drop-down menu button. Click "Add Category," and you will see the new sub-category appear underneath its parent in the list.
Using sub-categories
When you assign a sub-category to a transaction in one of your accounts, the transaction will display both the main category and its sub-category, separated by a colon. To illustrate, say that you assign the above-mentioned "Fuel" sub-category to a transaction. In the account register, the transaction will then show "Auto:Fuel" in its Category field:
![]()
When you create transactions, typing in the category field will cause Banktivity to suggest category names as you type. Use the arrow keys to select a category from the drop-down list, then press the Tab or Return key to accept it.
To quickly enter a sub-category, type the first few letters of the parent category (so that the category name is highlighted for autofill), then type a colon (:). You can then type the first few letters of the sub-category, and when the correct sub-category name is suggested, press the Tab or Return key to accept it. If you do not want to use one of the existing categories, ignore the suggestions that appear and type in a unique category name. When you save the transaction, Banktivity will prompt you to create a new category based on what you typed in.
Reorganizing
You can easily reorganize your category hierarchy by dragging and dropping categories and sub-categories in the list. If you drop one category on top of another, it will become a sub-category of the one you dropped it on. If you drag a sub-category to the top of the list, you will see a blue line to indicate that it will drop above the first category. Drop it there, and it will become a main category. Rearranging categories in this fashion will not disrupt any transactions that are assigned to those categories; the transactions will automatically update to reflect the category changes. You can create as many levels of sub-categories as you wish.
Analyze categories with reports
Once you have refined your categories and assigned them to transactions, you can use reports to analyze your spending in more detail. Summary reports in the "Overview" section of the sidebar and under each of your accounts show activity in your top several categories and allow you to drill down for more detail in any one of them. Income & Expense reports give you an overview of all your activity in a given time period, broken down by category, and let you drill down for more detail. Category reports are designed to show all activity in specific categories so that you can track your spending in those categories over time. Categories can also be used to limit the scope of any report you create, so that you can analyze your spending within those categories.
For more information about how categories and sub-categories are handled by reports, please refer to the pages about each report type in the Reports section.