How do I navigate a Banktivity document?
Once you install Banktivity, you will need to create a document. A Banktivity document is a data file that contains all of your accounts and their related transactions, categories, reports, and budgets. It lets you track everything in a single window that looks like this:
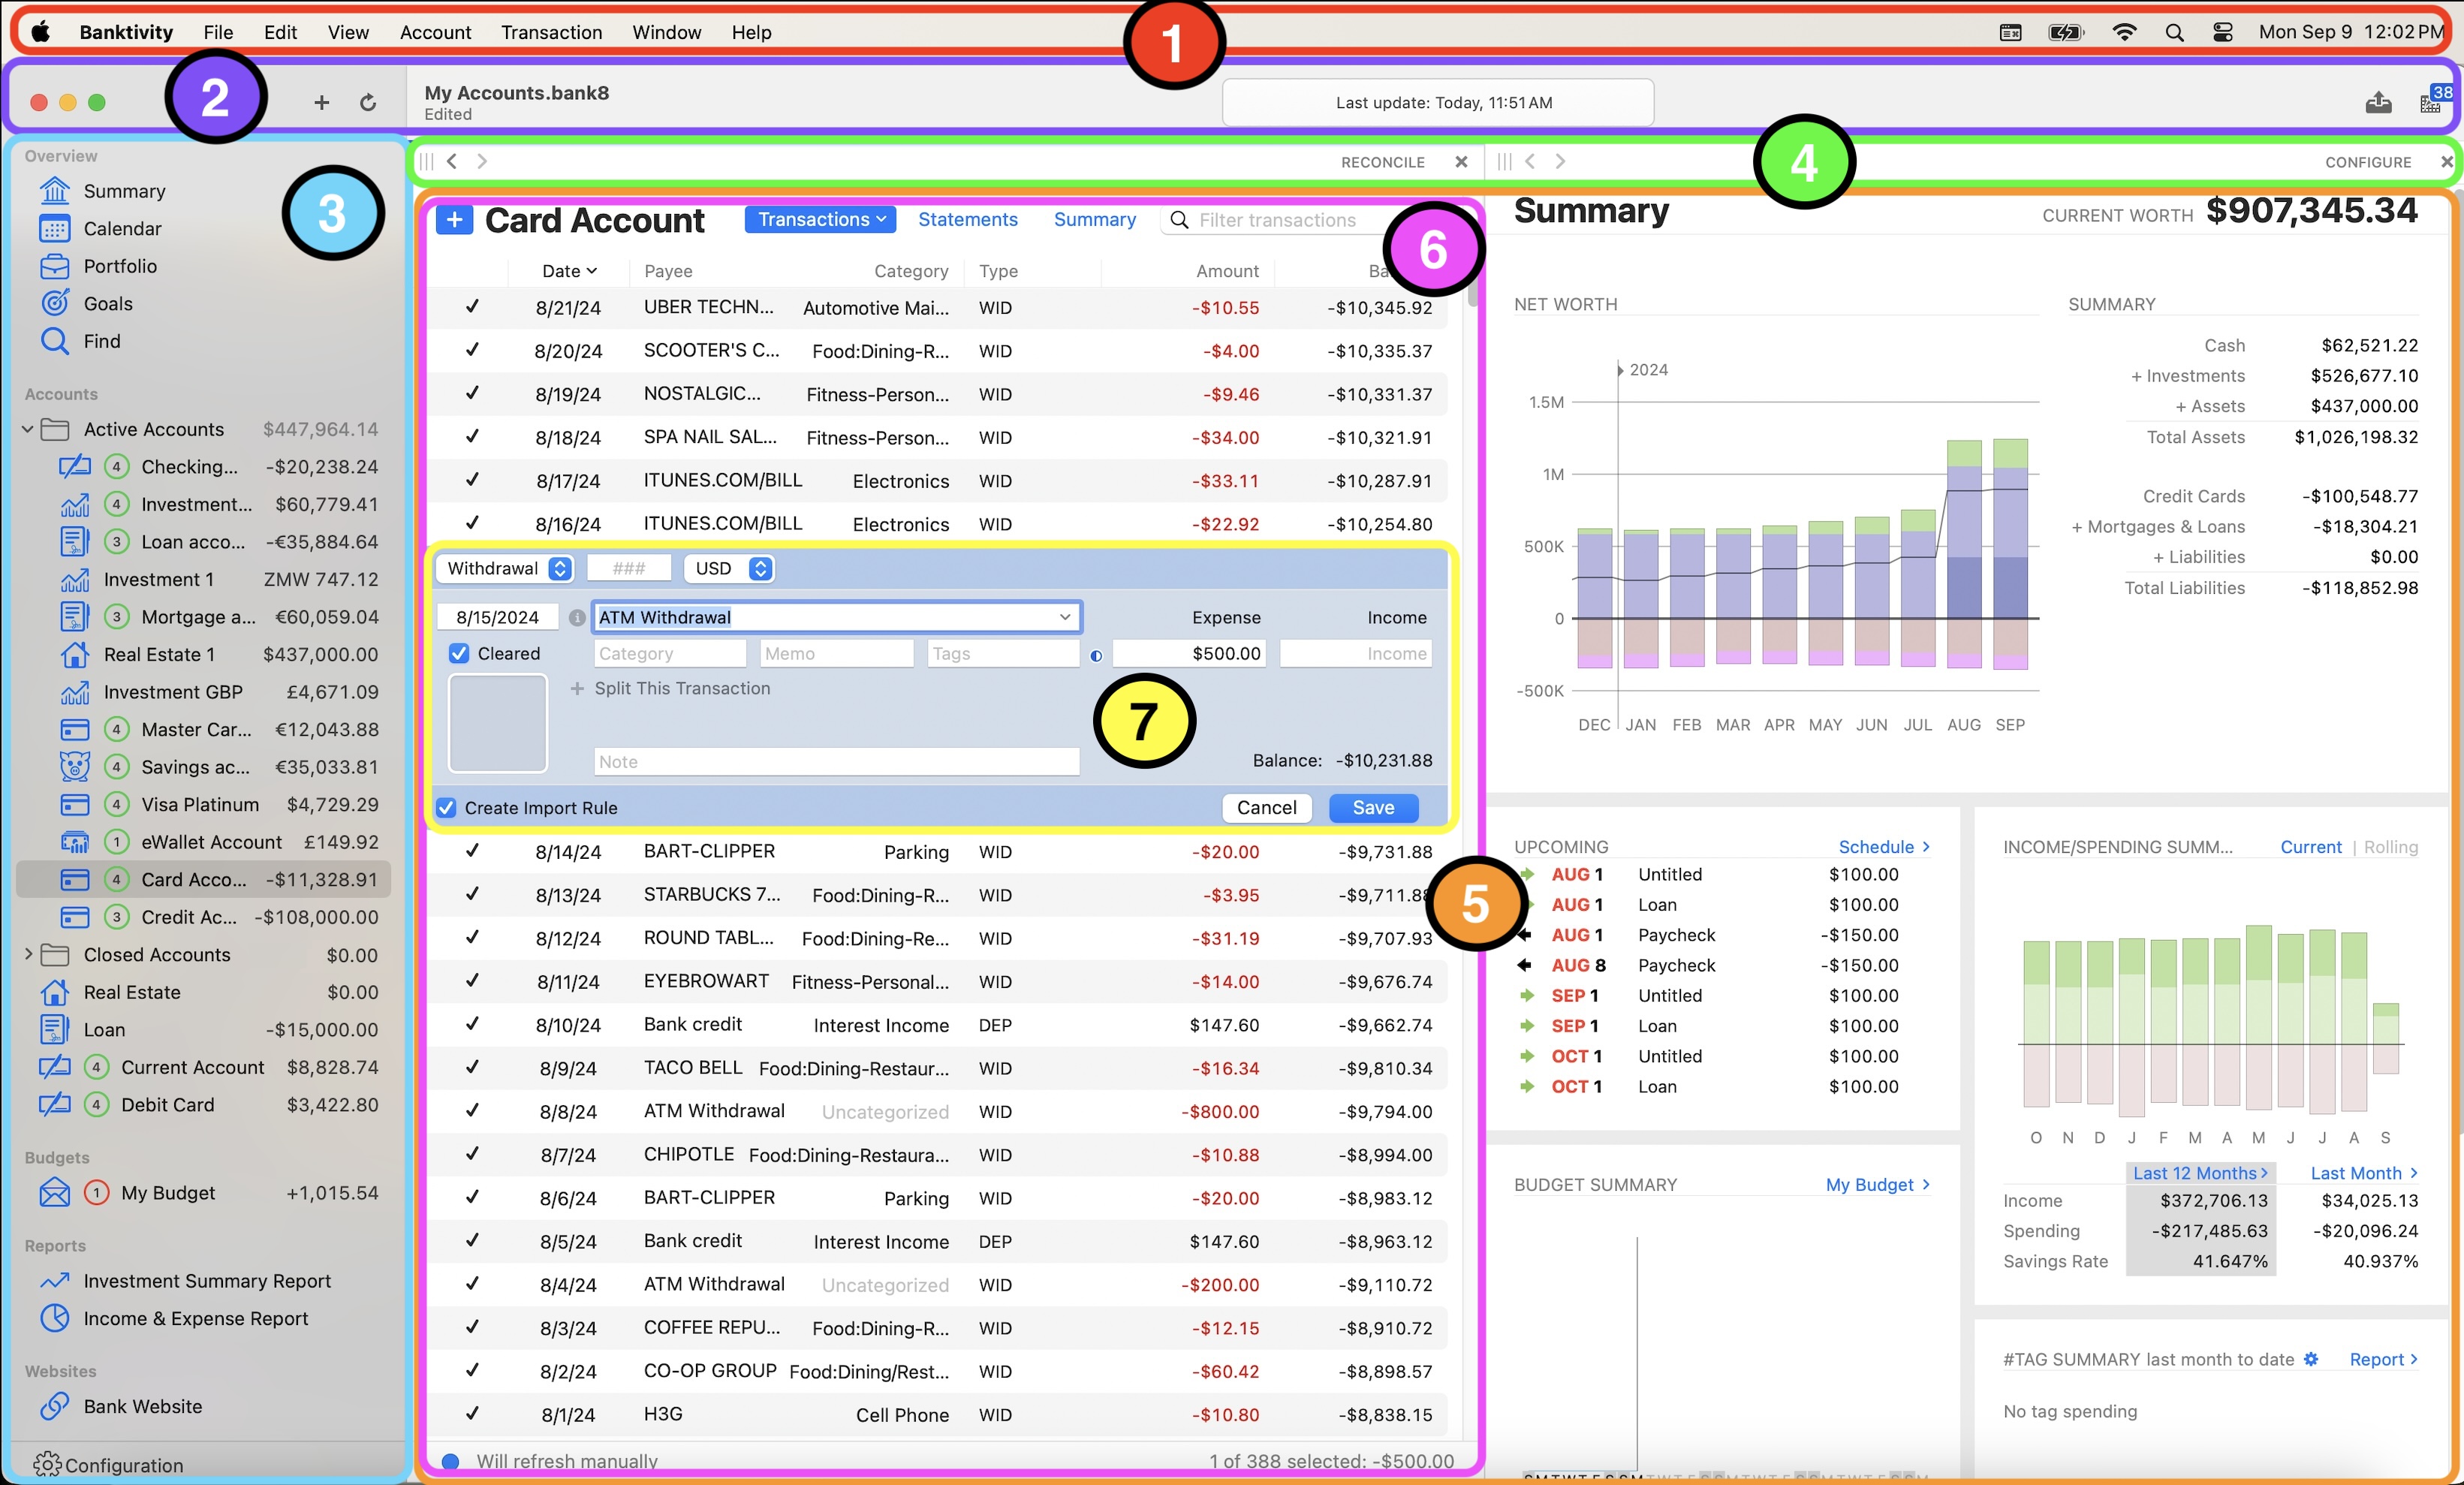
The numbers on the image above correspond to the following program areas:
- Menu Bar: The menu bar at the top of the screen shows options for Banktivity when a document is open. Inside the drop-down menus are commands to change the application preferences, create additional documents, manage your accounts and transactions, and more.
- Toolbar: This part of the window contains shortcuts to basic program functions and shows the status of your document.
- Sidebar: Use this section to navigate through Banktivity's main features, which are organized under different headings: Overview, Accounts, Budgets, Reports, Websites, and Configuration. The window contents displayed to the right of the sidebar change depending on your selection.
- Navigation bar:
Located at the top of each workspace, this part of the window contains
several buttons that allow you to navigate back and forth through views
of your data, as well as add and remove workspaces. Other buttons may
also be available depending on what item is selected in the sidebar:
- The quick sidebar button
 appears when the sidebar is
hidden. Click this to show your accounts, budgets, reports, and websites
in a popup window and change the contents of the current workspace.
appears when the sidebar is
hidden. Click this to show your accounts, budgets, reports, and websites
in a popup window and change the contents of the current workspace. - The drag handle
 lets you make a copy of a workspace by dragging it to the edge
of the workspace. If you are viewing a report, you can also use the drag
handle to save a copy of the current report view by dragging it to the
sidebar.
lets you make a copy of a workspace by dragging it to the edge
of the workspace. If you are viewing a report, you can also use the drag
handle to save a copy of the current report view by dragging it to the
sidebar. - The back (<) and forward (>) buttons let you browse recent views within a workspace, similar to how a web browser works. This allows you to navigate quickly from one view to the next, then easily return to the previous one.
- For example, if you are recording transactions in an account and need to edit a few categories, you would leave the account register and view the category list. Once you finish editing the categories, you can click the back button to jump back to your account register. If you realize you need to make a few more changes to the category you just edited, click the forward button to jump to the category list again.
- The minus (-) button at the top right of each workspace lets you remove the workspace (if you have more than one open).
- The quick sidebar button
- Workspaces: The contents of the item selected in the sidebar are displayed here. This area can be divided up into several workspaces in order to compare different views of your data side-by-side.
- Account register: When an account is selected in the sidebar, this part of the window shows a list of all the transactions in the account. Buttons above the register allow you to add transactions, filter the register, reconcile statements, and view the Account Summary report.
- Transaction editor: Double-click a transaction in the account register, or select a transaction and press the "Enter" key on your keyboard, to view and edit the transaction details.