How do I reconcile my account with a bank statement?
If you are in the habit of comparing your own records against your bank's on a regular basis, Banktivity makes it easy to track the statements your bank sends in the mail. Create a virtual statement in Banktivity to mirror the printed copy your financial institution sends periodically.
Add a new statement
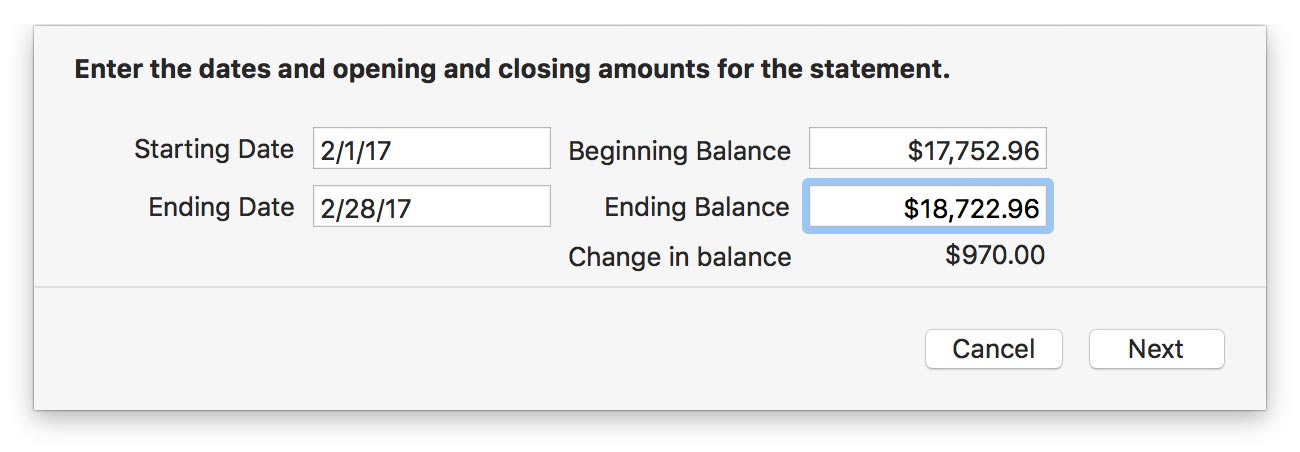
When you receive a statement from your financial institution, select the account you want to reconcile, then click the "Reconcile" button on the navigation bar. In the sheet that appears, configure the details of the new statement:

- Starting date: Enter the starting date for the statement period (as indicated on the printed statement). By default, Banktivity shows the day after the ending date of the previous statement.
- Starting balance: Enter the account's balance as of the beginning of the statement period (as indicated on the printed statement). By default, Banktivity shows the ending balance from the previous statement. If you are reconciling an account for the first time, set the starting balance to 0.00 in order to accommodate the account's initial balance adjustment. For credit cards and other liabilities, be sure to enter the balance as a negative number.
- Ending date: Enter the ending date for the statement period (as indicated on the printed statement). By default, Banktivity shows the last day of the month indicated by the default starting date.
- Ending balance: Enter the account's balance as of the end of the statement period (as indicated on the printed statement). By default, Banktivity shows the balance recorded one month after the previous statement's ending date. For credit cards and other liabilities, be sure to enter the balance as a negative number.
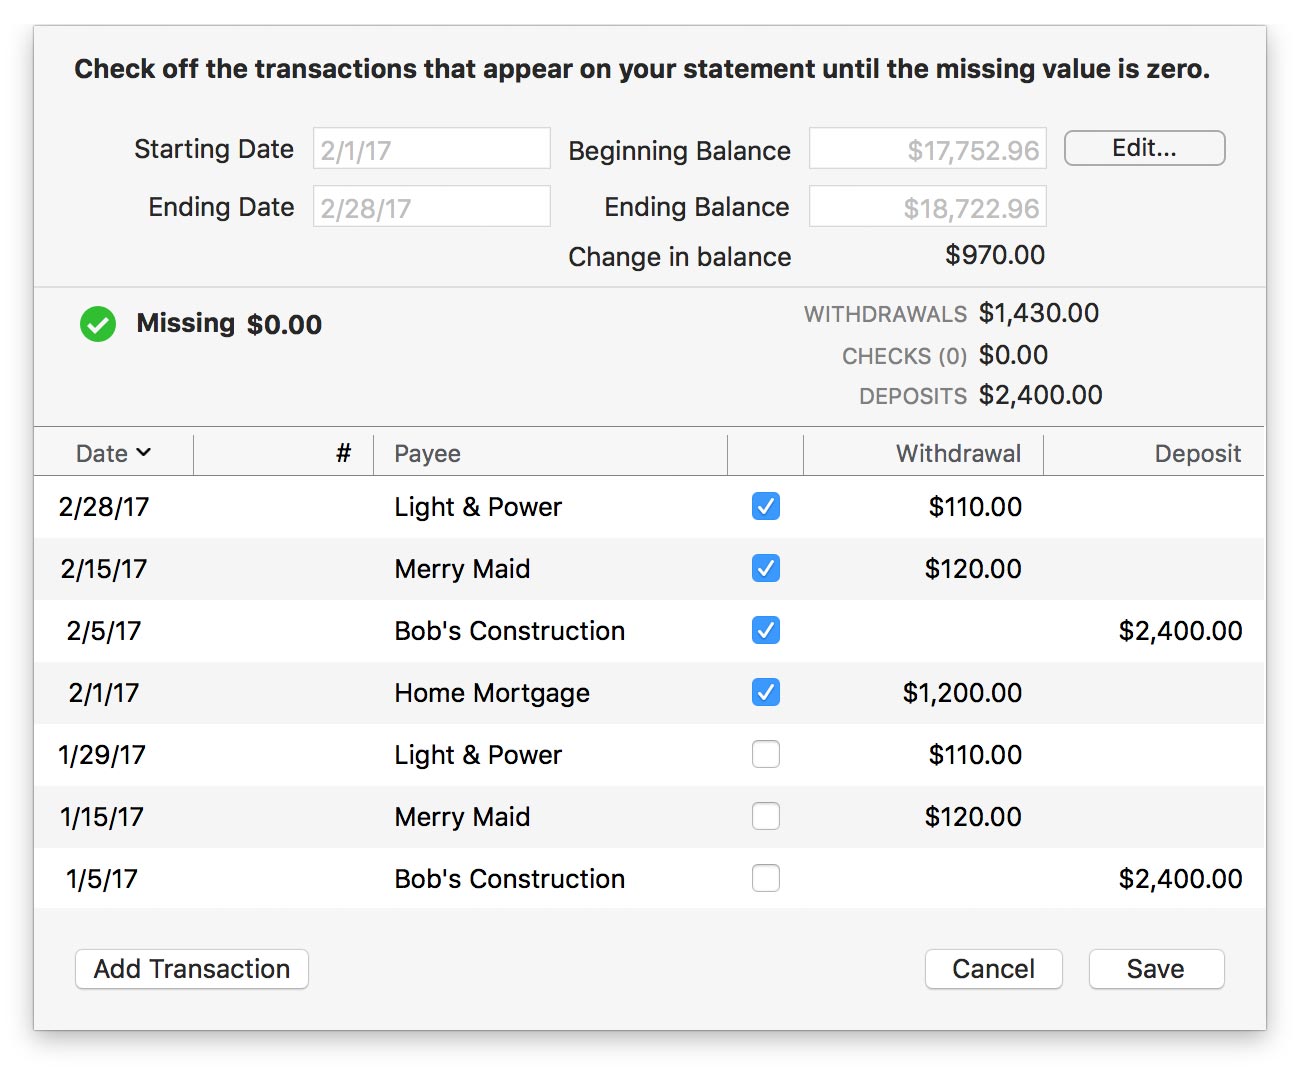
Click "Next" and Banktivity will show you a list of all unreconciled transactions in the account. Check off the ones that appear on your printed statement to mark them as reconciled. Transactions with their status set to "cleared" in the account register are automatically marked as reconciled, but you can uncheck any that do not belong on the statement.

Use the summary information above the transaction list to help you reconcile the statement:
- Withdrawals: The total value of all transactions on the statement that are marked as reconciled and have amounts in the "Withdrawal" column, but are not checks.
- Checks: The total number and value of all check transactions on the statement that are marked as reconciled.
- Deposits: The total value of all transactions on the statement that are marked as reconciled and have amounts in the "Deposit" column, but are not checks.
- Missing: The difference between the total value of the reconciled transactions (withdrawals, checks, and deposits) and the "Change in balance" shown above. To reconcile the statement, this figure must be brought to zero.
Each time you
mark a transaction as reconciled, the summary information updates
automatically. Continue marking transactions as reconciled until
"Missing" is zero. When you have successfully reconciled the
statement, a green check  will appear next to "Missing." Click "Save" to finish
reconciling the statement.
Transactions that have been
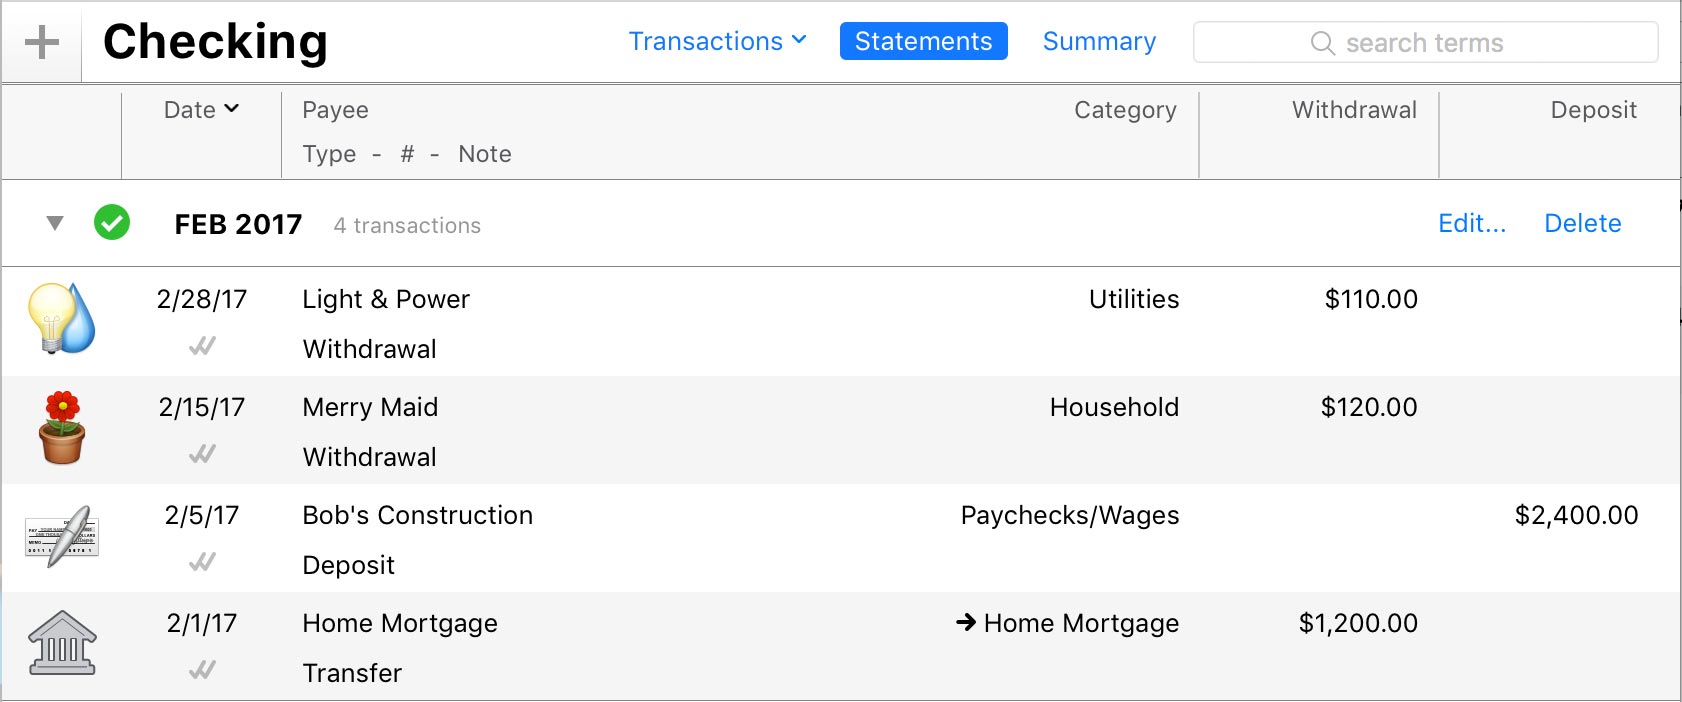
reconciled on a statement show a double checkmark  in the account
register to indicate their status is "Reconciled."
You can add, edit, and delete transactions while reconciling a statement. To add one, click "Add Transaction." To edit, double-click a transaction in the list. To delete, select a transaction and press "Delete" on your keyboard. All changes you make to transactions while reconciling affect your account register as well.
View the statement list
Click "Statements" above the account register to view a list of statements in the account and the transactions that belong to them.

Balanced
statements show a green check mark  ; statements with
discrepancies show an orange exclamation point
  . You can edit
transactions directly on the statements, but be aware that if you
adjust a transaction amount on a balanced statement, that statement
will no longer be balanced.
Edit a statement
If you need to make changes to an existing statement, view the statement list, then click "Edit" next to the name of the statement you want to modify. Just like when you first created the statement, you can set the starting and ending dates and balances, then choose which transactions belong on the statement.
Adjust an account balance to cover a discrepancy
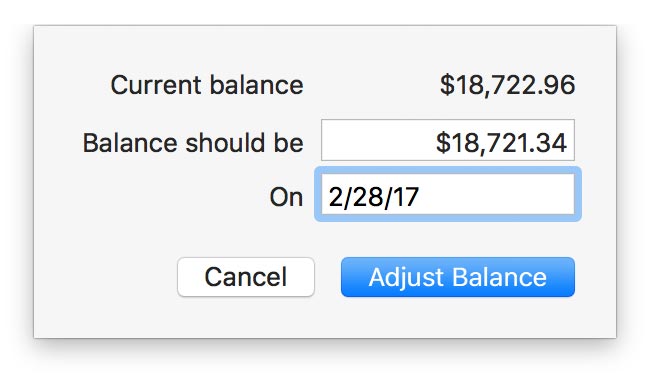
Sometimes, after you have finished reconciling the transactions in Banktivity with those on your printed statement, a discrepancy may still exist between your reconciled sum and the statement total. If you check and double-check your records, and just can't seem to find a transaction that was overlooked, you can enter a balance adjustment to sync up your records. Click "Transactions" above the statement list to view the account register, then choose Account > Adjust Balance. The following sheet will appear:

Enter the desired account balance and click "OK." A deposit or withdrawal will be added to the register to record the adjustment. Click "Statements" above the account register to go back to the statement view, edit the statement with the discrepancy, mark the adjustment transaction as reconciled, and save the statement. The statement is now properly balanced.
Delete a statement
Select the account from which you want to delete the statement, and click "Statements" above the account register. Click "Delete" next to the name of the statement you want to remove, and Banktivity will ask for confirmation before deleting the statement. Any transactions that were reconciled on the statement will have their status changed to "cleared."